Integrating Jervis with RentalWise

What Is Jervis?
Jervis Systems® is an access management platform that simplifies and automates property access for rental managers and hosts. It integrates directly with smart home devices to automate guest access based on reservation details — enhancing security and improving the overall guest experience.
Key Features of Jervis
Simple Entry Technology® (SET®) – Generates unique door access codes for guests automatically.
Automated Guest Access – Access codes are created and sent based on confirmed booking details.
Smart Home Device Integration – Works with leading smart lock and Wi-Fi systems.
Seamless Property Management Integration – Reduces host workload and enables efficient automation.
Founded in 2019 by Bobby Varghese, Jervis Systems® helps property managers deliver effortless, secure, and contactless guest check-ins.
How to Integrate Jervis with RentalWise
Before starting, ensure you have an active Jervis account.
Step 1 – Retrieve Your RentalWise API Key
Log in to your RentalWise account.
Navigate to Integrations → Add Channel → Select Jervis.
Copy the API Key displayed on the screen.

Step 2 – Connect RentalWise to Jervis
Log in to your Jervis account.
Go to the Marketplace.
Search for RentalWise, click on it, and toggle the connection switch ON.
Paste the API Key from Step 1 into the required field.
Confirm the connection.

Step 3 – Integrate Jervis in Your Message Templates
To ensure the lock access code is automatically sent to guests, include the following merge field in your message templates:
{{ record.custom_fields.jervis_door_code }}
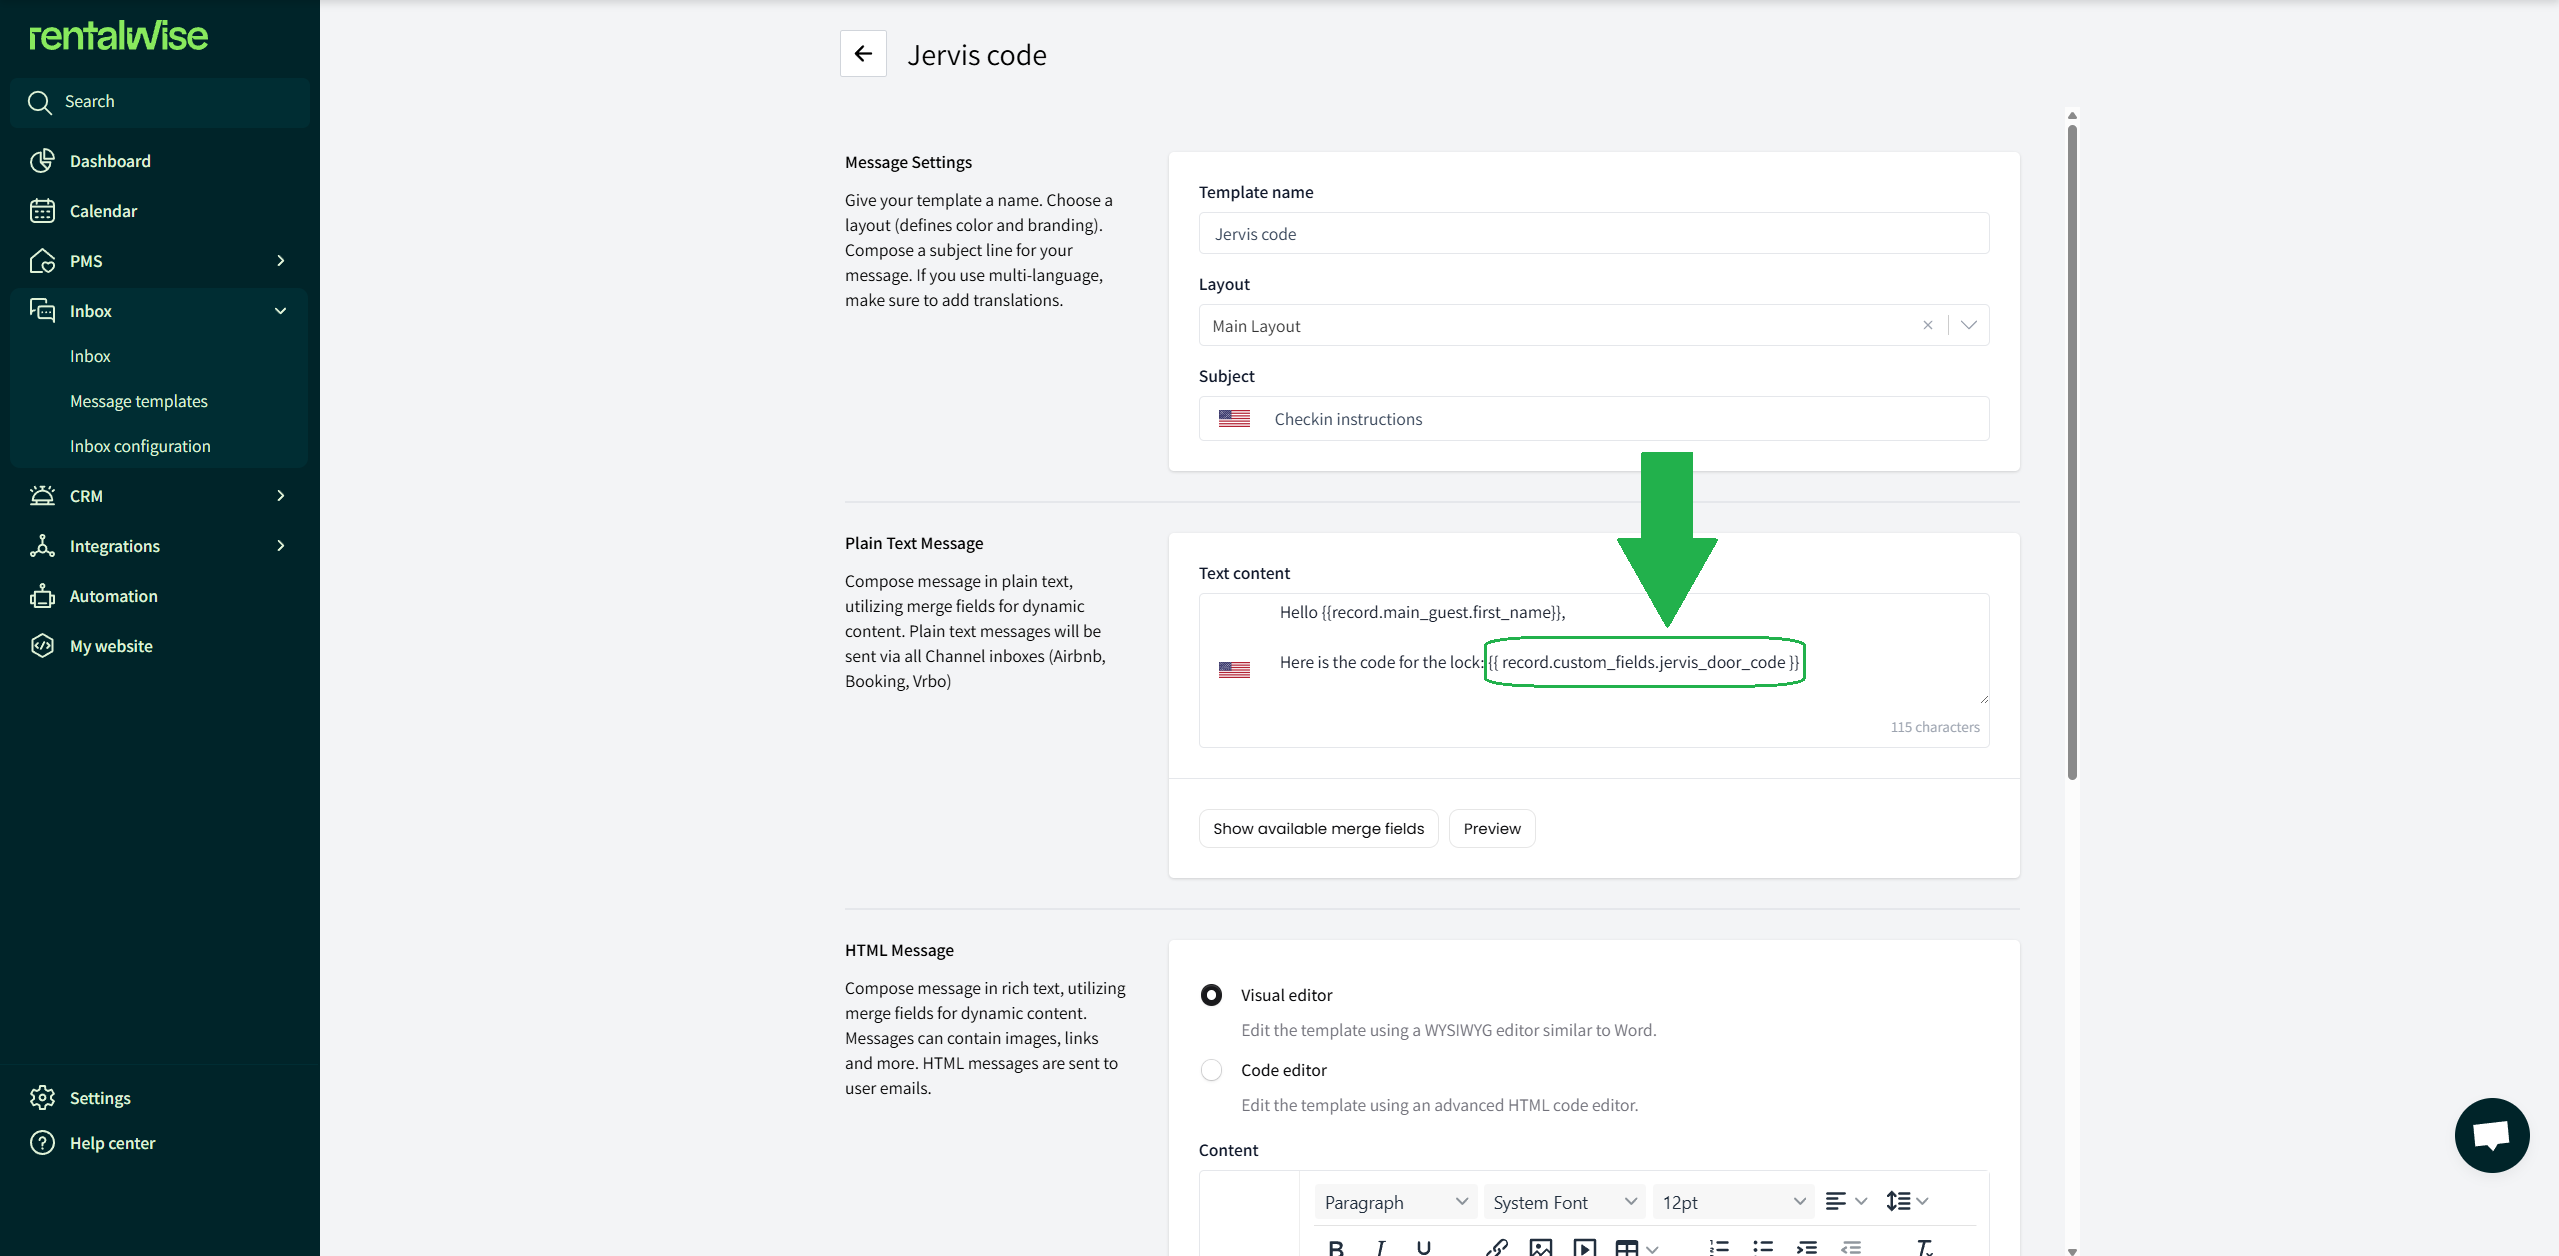
This will allow Jervis to send each guest’s unique smart lock code through your automated RentalWise messages.
Same-Day Reservation Automation
To ensure that even last-minute reservations receive their Jervis access codes on time, it’s important to create a dedicated automation. This will ensure codes are generated, attached, and delivered to your guests automatically — even for same-day bookings.
Follow these steps carefully to set it up:
Step 1 – Prepare the Message Template
Create or edit your message template to include the merge field:
{{ record.custom_fields.jervis_door_code }}This will ensure the access code can be dynamically generated and attached to the message.
Step 2 – Configure the Automation
Now, set up the automation to send the message immediately after the code is created:
A. Workflow Time Trigger:
2 minutes AFTER External Pin has been generated.
B. Automation Conditions:
Status = ConfirmedBooking Window ≤ 1(for same-day or last-minute bookings)
This configuration ensures the message fires automatically right after Jervis generates the access code — giving your guests instant and reliable entry instructions.
Things to Remember
 Once connected, all Jervis-related access management must be handled directly in Jervis.
 To disable the integration, you must disconnect it from your Jervis account.
 After establishing the connection, contact Jervis Support via chat to receive your unique Jervis codes and verify your setup.
By following these steps, you’ll ensure a seamless, automated check-in experience for every guest — including those making last-minute bookings.