At RentalWise, we understand just how crucial it is to ensure a smooth transition from one PMS to another, or even simply to migrate your raw booking data into your RentalWise environment.
That’s why we’ve designed a fast, intuitive, and reliable process to help you import your bookings with ease.
 Before You Begin
File Format Requirement
The file you import must be an Excel file (.xlsx format). Any other file format will not work.
Also, make sure your file contains at least the following key columns:
Property Name
Check-in / Check-out Dates
Guest Name
Total
Currency
Adults
Status
ALL available fields include:
Check-in
Check-out
Guest Name
Guest Email
Guest Phone
Total
Currency
Funds Received
Adults
Children
Notes
Source Name
External ID
Booking Status
(Importing 2-3 bookings before importing the entirity of your data can be helpful to understand the process)
 Step-by-Step: Importing Your Bookings
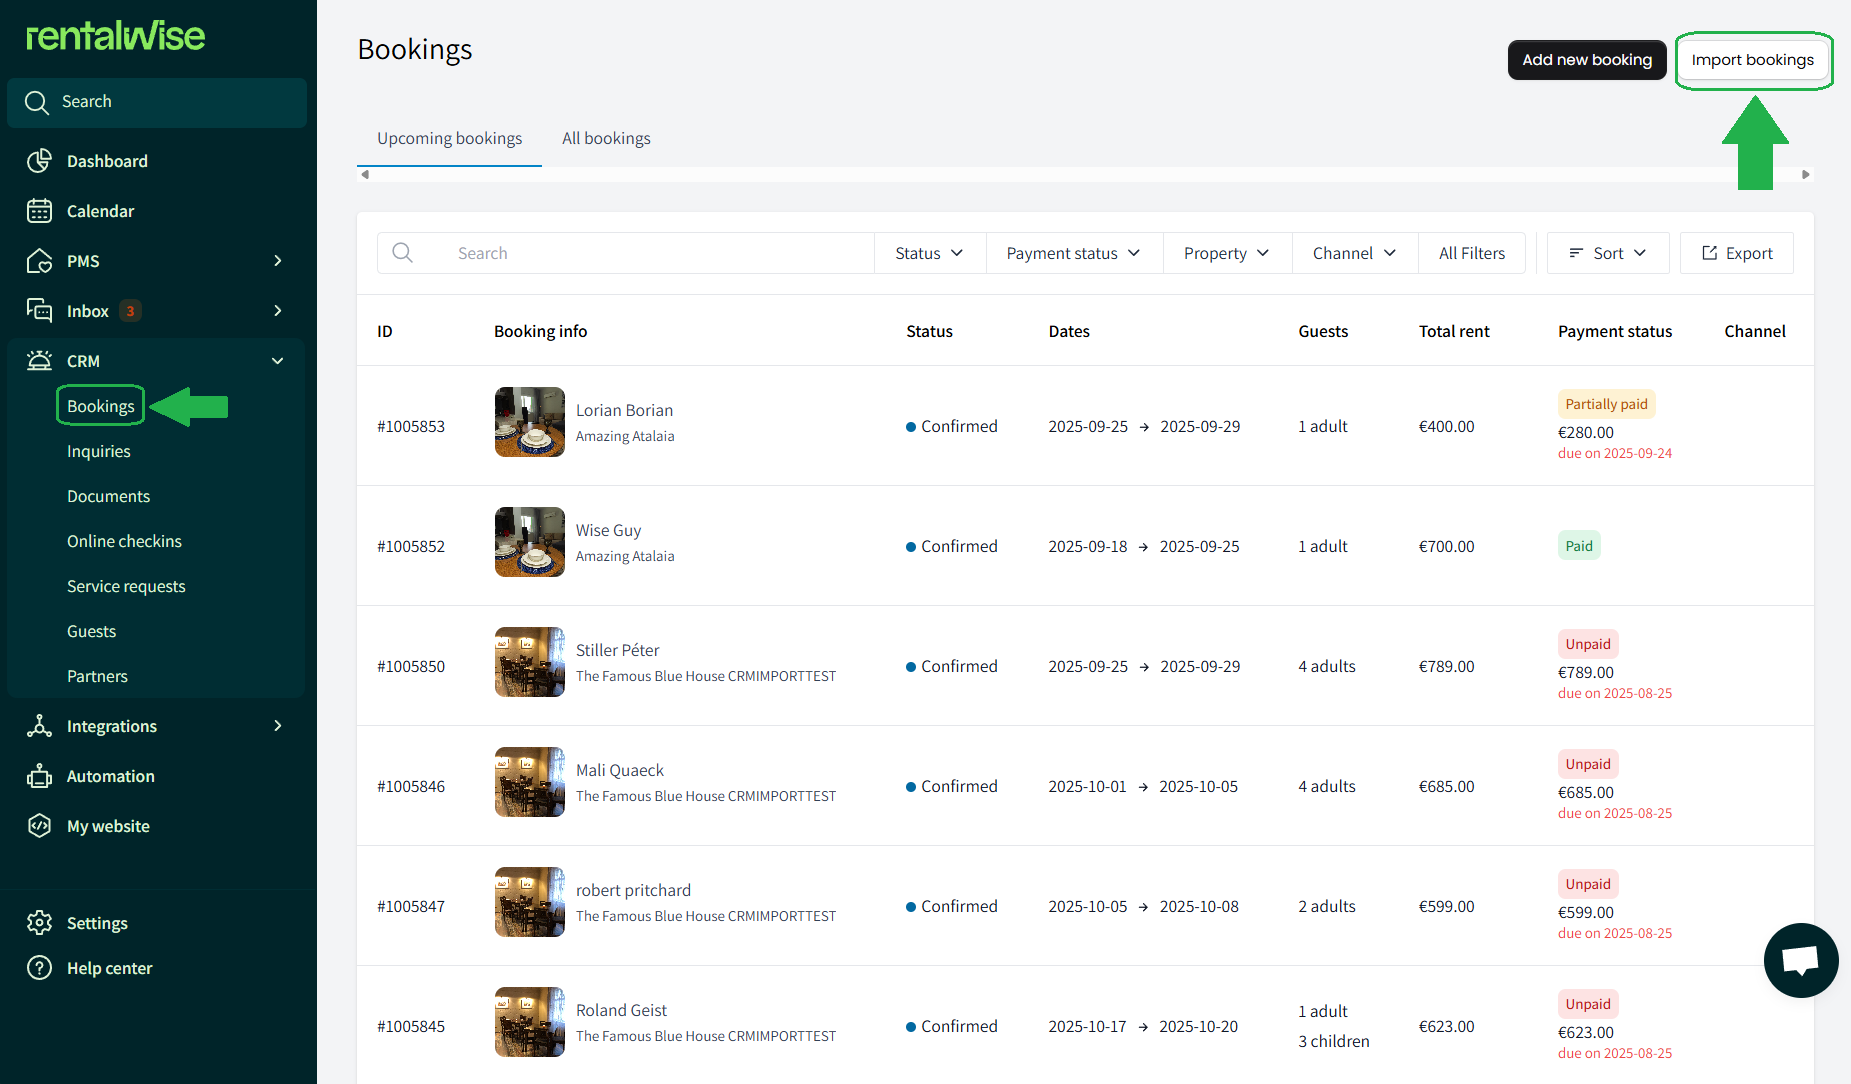
Step 1 – Access the Import Tool
Go to CRM → Bookings → Import Bookings
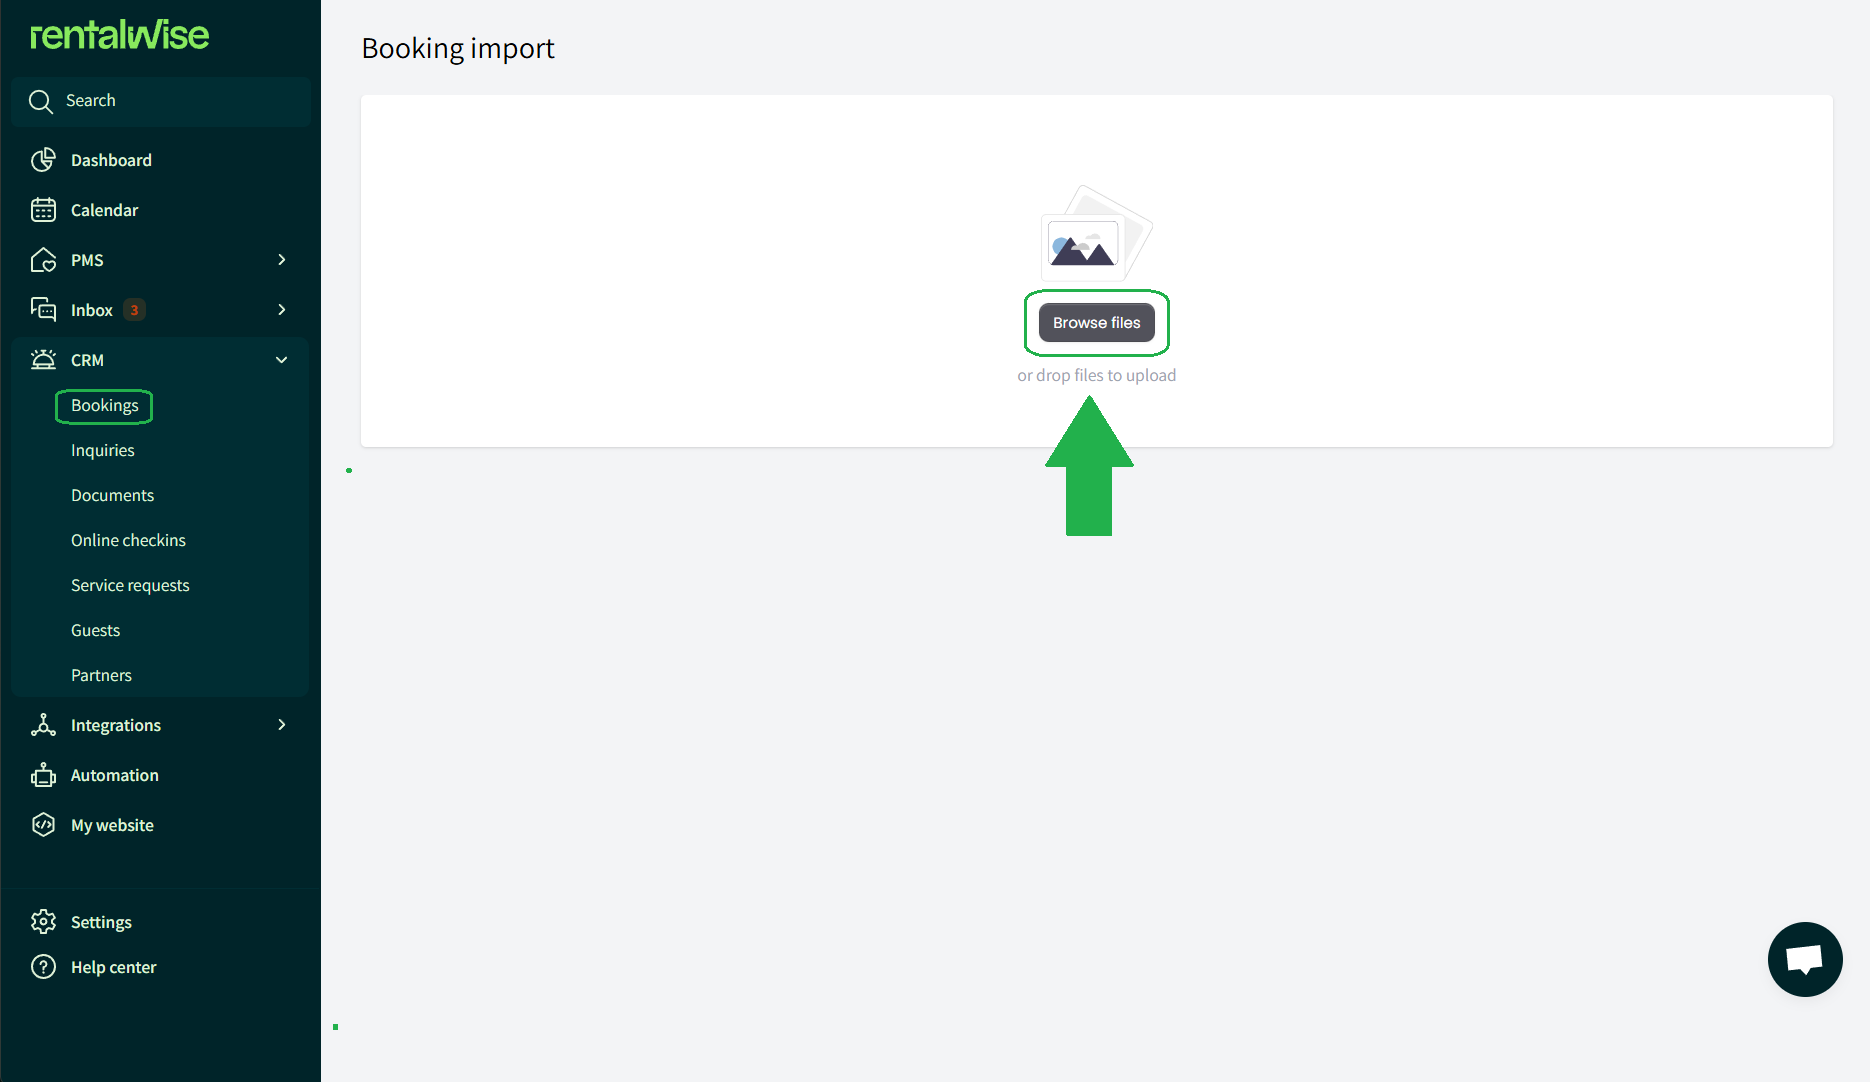
Step 2 – Upload Your Excel File
Click Browse Files and attach your Excel file containing the bookings you want to import.
Step 3 – Map Your Fields
After uploading, you’ll see an interactive mapping menu with 15 total fields.
8 of these are required fields (marked with a red asterisk ★). These must not be changed or removed.
The remaining fields are optional.
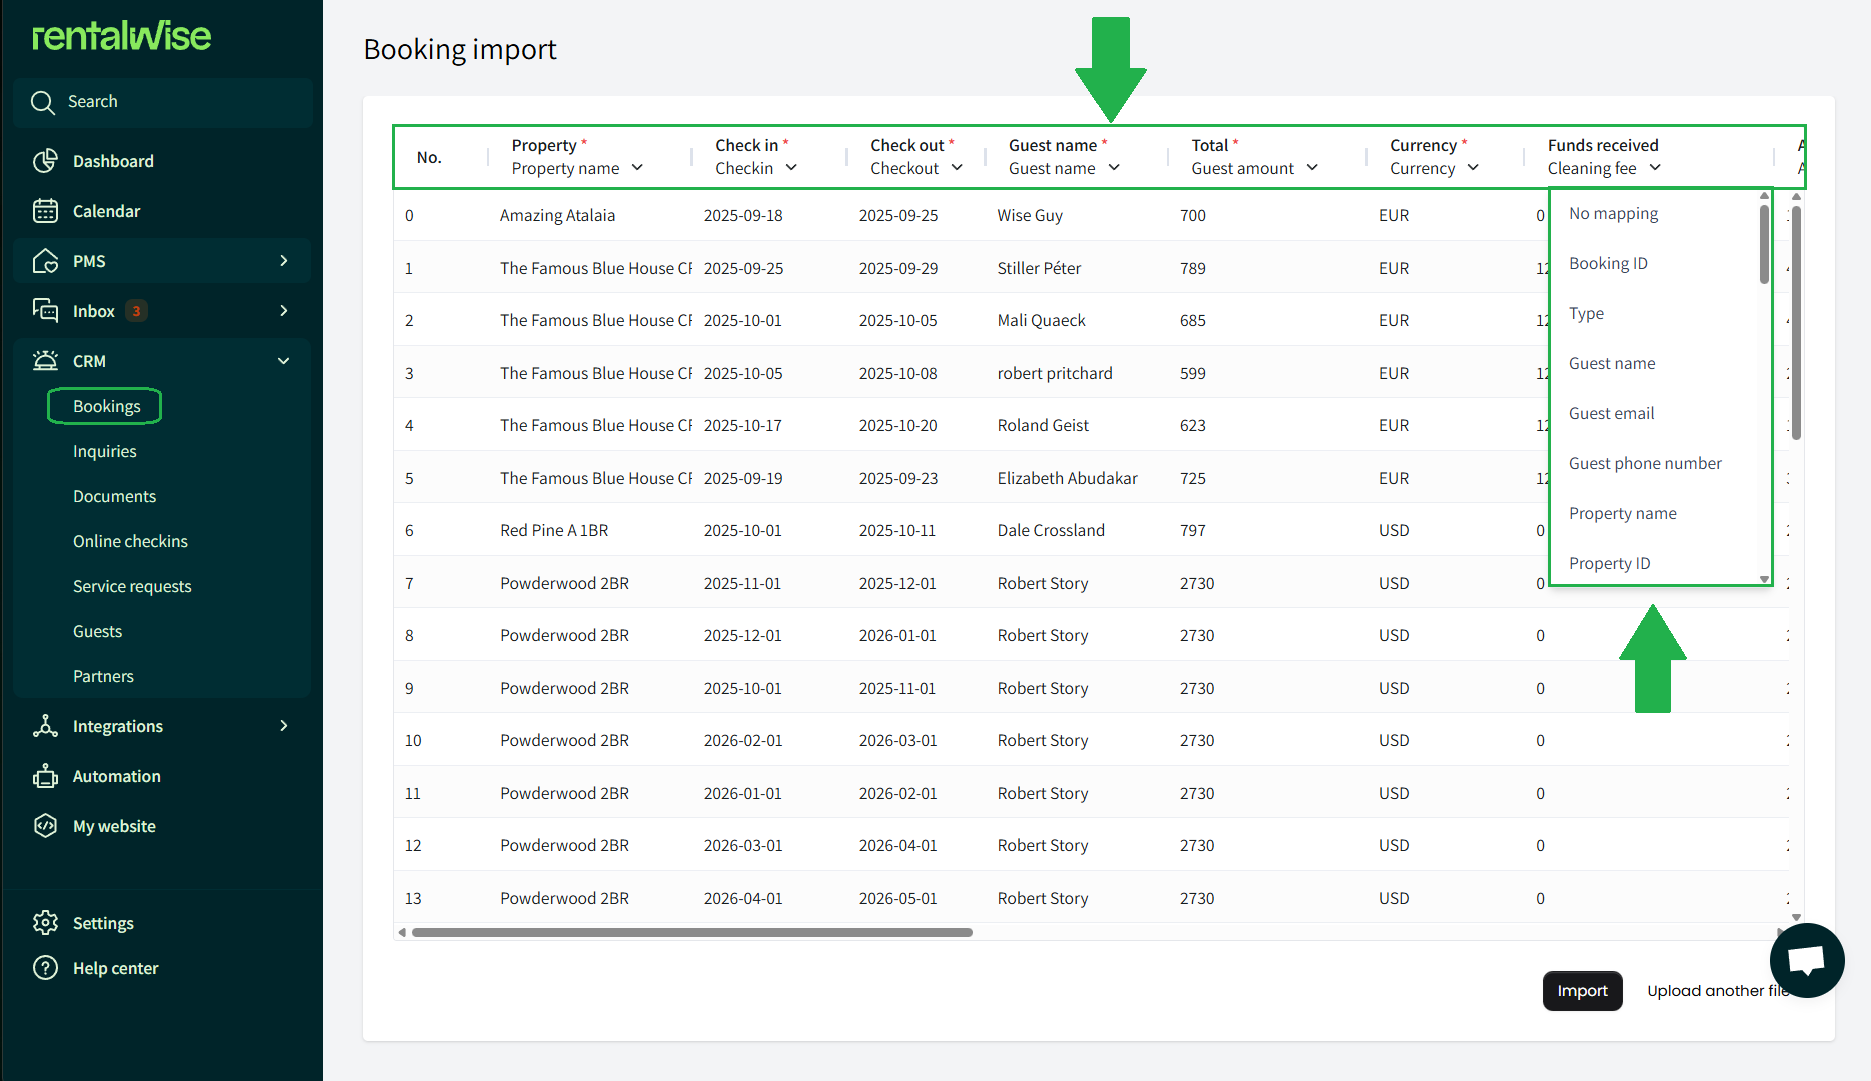
 Example:
If you don’t have a Guest Email column in your file but that data exists in your Notes column, simply map the Guest Email field to Notes so the information imports correctly.
Step 4 – Final Check & Import
Make sure no errors are shown.
Click IMPORT to complete the process.
Your bookings will now be added to your RentalWise environment.
Key Things to Note
 Do not modify the required fields. Changing or removing them will cause errors and block the import.
 You can remap optional fields (those without the red asterisk) to match whatever data you have available. This helps ensure a smooth migration of your booking information.
Make sure your automations are disabled before importing to make sure no automatic firing without intent happens.
Make sure your Taxes & Fees are set up on the property level before importing as taxes and fees will be 'reverse engineered' based on your reservation totals
Make sure to note 'funds received' to import with the proper payment status. Reservations with totals matching funds received are considred 'paid'.
 That’s It!
You’ve now successfully imported your bookings into your RentalWise account.
This simple yet powerful tool makes onboarding or data migration effortless, keeping all your information centralized and organized from the start.